AT2 Part B Lake Eyre Group Mapping
Layer 1 Process
Group 2 Roles
LAYER 1 - Josh -28.584, 137.57283
LAYER 2 - Jacinta -28.3159, 137.73125
LAYER 3 - Katherine -28.51177, 137.56813
LAYER 3 - Katherine -28.51177, 137.56813
LAYER 4 - Mathilde -28.35738, 137.61728
LAYER 5 - Naomi -28.32853, 137.79179
Layer 1 Role
1 Theme: Landscape structure
Concern: geographic arrangement: shape, size and relative location of landscape features. Technique/method: line work (digital)
Site & Scale


- We had to create our site around our group's 5 coordinates, the dimensions of the site measure 25 km by 30 km. As my role was layer 1 I used rhino and scaled the satellite images of our site for the group.
- we used a scale of 1:65000 because it was an nice whole number that that scaled the reference image nicely on an A2. unfortunately we overlooked the fact that it wasn't a scale that is easy to understand and isn't derived from common scales used.
- we should of used a 1 to 80000 because that much more easily divisible by 1 to 20 which is a common scale
Line work Precedents

-I found that line work from my tutorial was the most helpful as they were exact examples for the further direction of my layer and my groups layer
- the above image was Caitlin's layer from group 1 of my tutorial
Group Work Process
- Our Group
Layer 1 Process
- From the initial site that we created. I started to interpret the shoreline and create the line work for the following layers to follow. I then shared the following References for my other group members to follow. Each are A2 and are the same view in rhino just exporting with different layers turned off.
Common References


Rhino and illustrator experimentation


Experimentation and testing
- After I created I created my first iteration with the line work I did small digital experiments using other digital programs other then rhino
- This experimentation wasn't very helpful because they are very chaotic, they don't combine well with the other layers and they don't relate to the site very well
Creating My layer
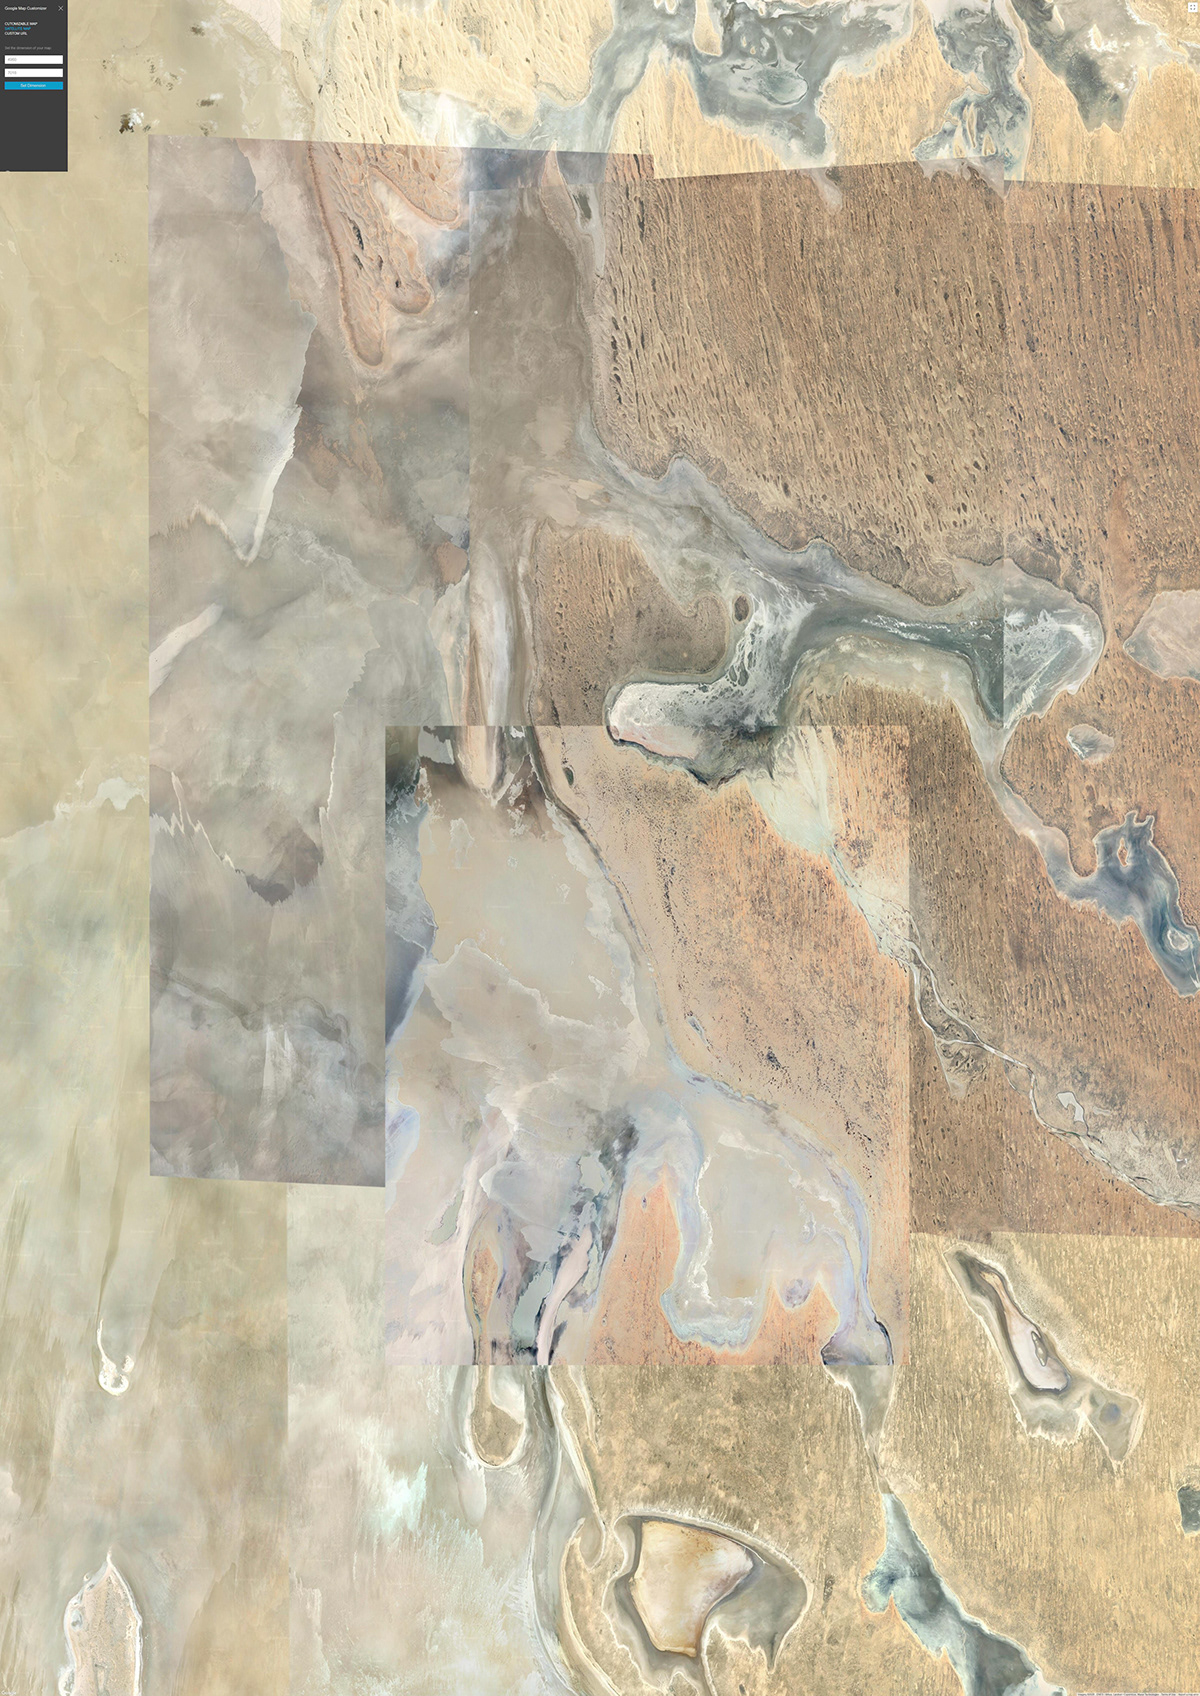
- To create my layer the final process that I used is quite simple it just requires quite a lot of concentration and time. As I had already set up the satellite photo to scale for the group using Bing maps and scaling the image to correct size using the graphic scale in the corner, I was ready to create the line work.
- for my first line work I used the Sketch command in Rhino, Following the quite distinct shoreline that was visible in the reference photo. I then refined parts of my line work with the lines control points.
- for my next iteration I need to create a more accurate line work. to do this I had to use more satellite images then the single one from bing maps. the most useful image that i created was through a google maps chrome extension that stitches multiple views of an area on google maps to give you a better image. once I had this image to work off I switched my drawing tool to the interpolate points curve and used an extra level of control points so that I could go back and fix my curve.
- through our group consultation this iteration worked very well. Then i tried to add more features through the line work, however they directly clashed with our hydrology layer so I dialed them back for the final layer and added a graphical scale and north point
Layer 1 Iterations


Iteration reflections
-
Group Iterations


Part B Reflections
-our group continuously struggled with our alignment of our layers, we all tried harder and harder to fix this issue and we made progress but it wasn't perfect.
I couldn't figure out what the exact problem was but I have a strong suspect that it was our process for exporting, somehow everyone did everything slightly different.
